

Getting started with Textedly is easy! In this step-by-step guide, we’ll go over how to navigate the platform and use Textedly. You’ll learn how to upload your contacts, send messages, view your activity reports and more in just a few minutes.
Check out our ”How to Operate Textedly” video on YouTube for a video tutorial.
Table of Contents
- Step 1: Log In to Your Textedly Account
- Step 2: Start a Campaign
- Step 3: Upload Your Subscribers
- Step 4: Draft and Send a Message
- Step 5: Monitor Your Campaigns
Step 1: Log In to Your Textedly Account
To log in to your account, simply navigate to Textedly.com and enter your email address and password on the login screen.
Once you log in to your account, you’ll land on the main dashboard page. From here, you can navigate to other areas of the site using the vertical menu along the left-hand side.
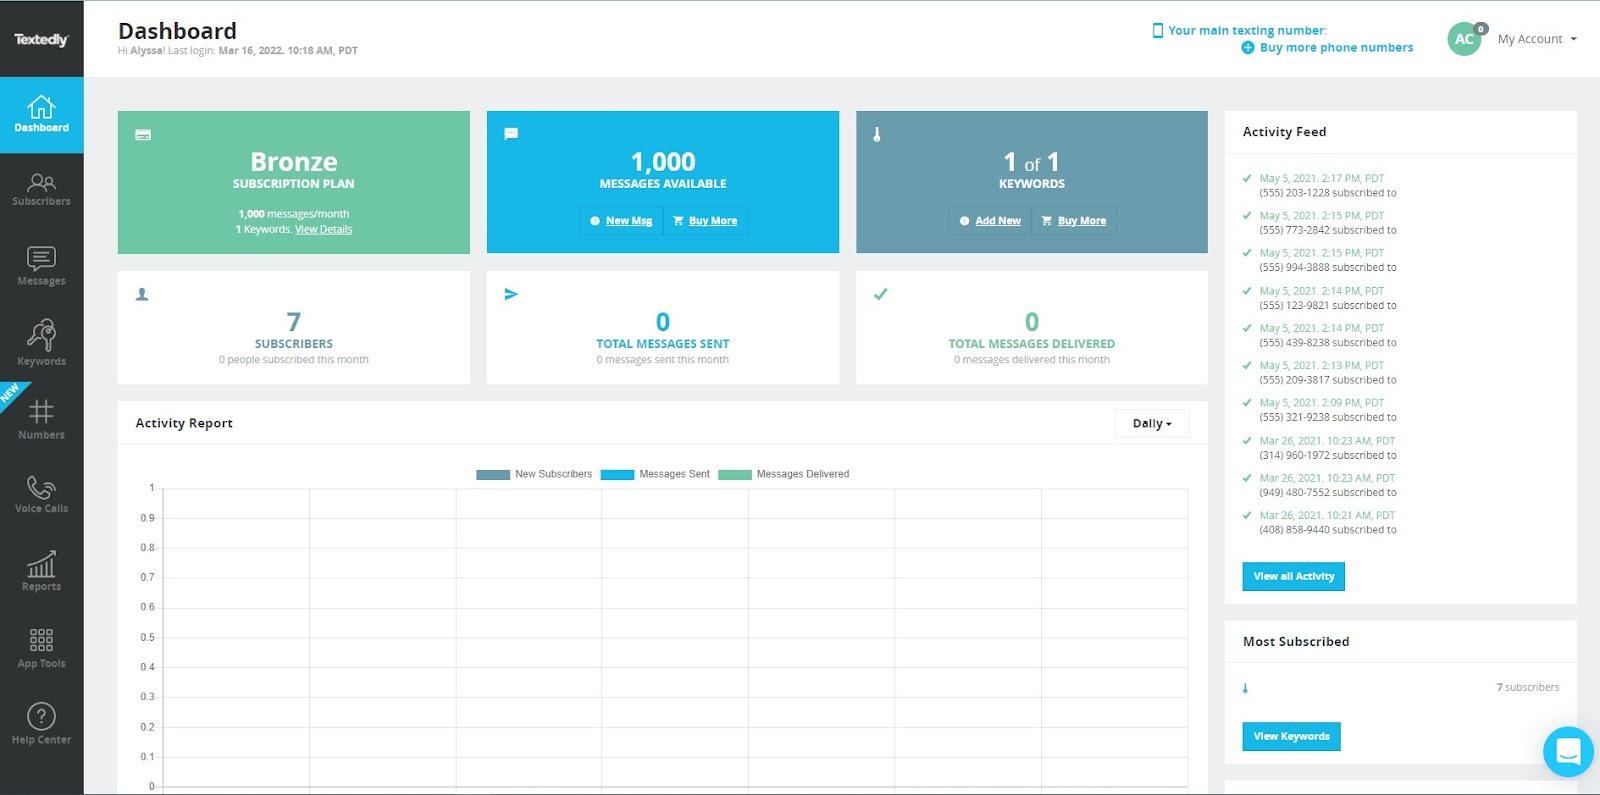
The dashboard allows you to see your active subscription plan, how many messages you have available to send to your contacts and how many keywords you have at your disposal.
Below this information, you can see additional metrics like how many subscribers you have, how many messages you’ve sent and — of those messages — how many have been delivered.
Step 2: Start a Campaign
To start a campaign, you must first set up a keyword. Keywords serve two essential purposes:
- Your keyword will act as your group name under which you'll organize your contacts. This helps you segment your contact lists.
- Your keyword makes it easy to build your contact list. New contacts text your keyword to subscribe to your SMS messages.
To set up a keyword, select “Keywords” from the menu on the left and click on the blue button in the top right labeled “New Keyword.”
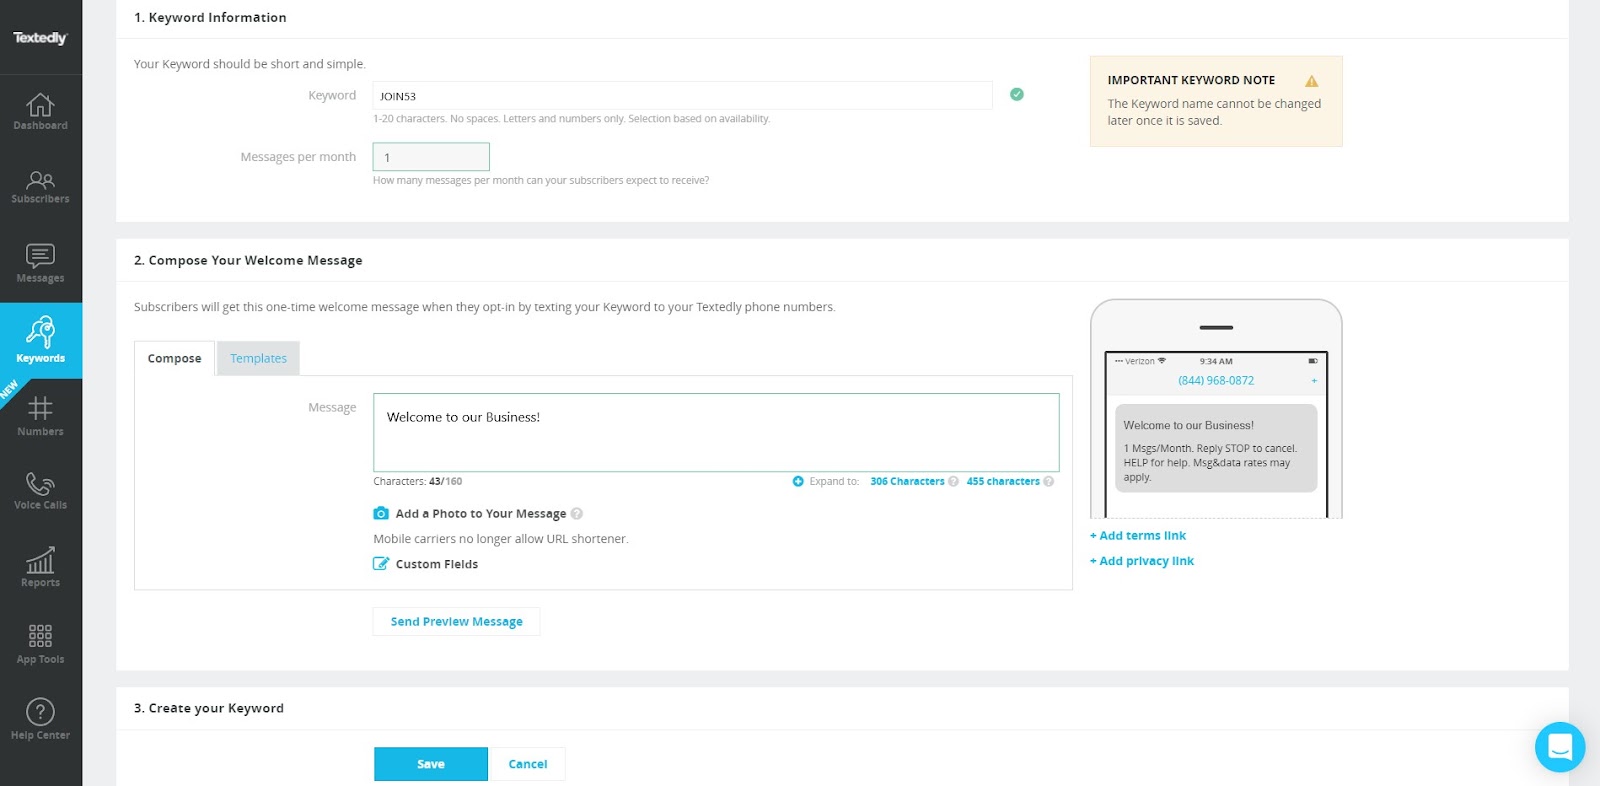
On the next screen, type in your desired keyword and the number of messages your subscribers can expect to receive from you each month. Next, compose the welcome message you’d like your contacts to receive once they opt-in.
Finally, click “Save” to submit and create your keyword.
Note: Keep in mind that Textedly must approve all keywords. Your contacts will not get your welcome message until your keyword is approved.
Step 3: Upload Your Subscribers
In the left-hand navigation menu, click on “Subscribers.” Once you click on the blue button labeled “New Subscriber,” you will have the option to add subscribers or upload a list manually.
Adding a subscriber manually is a fairly self-explanatory process, so let’s explain how to upload a list.
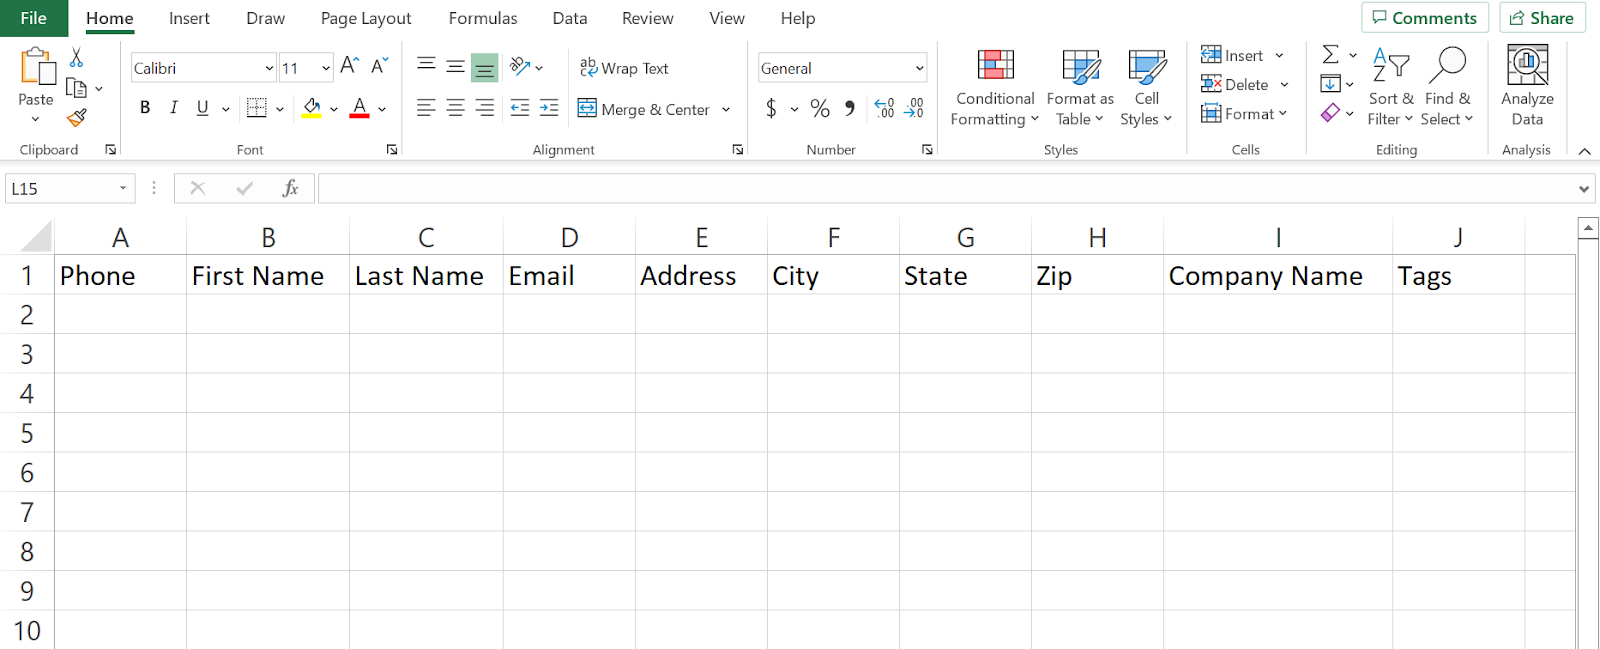
First, you must create a spreadsheet containing all your contacts' phone numbers. A phone number is the only mandatory field, but you may also add First Name, Last Name, Email, Address, City, State, Zip, Company Name and any tags you’d like to use to identify or categorize your contacts.
Note: Whether you choose to enter information into the other columns is up to you, but you must include the headers regardless.
Here is an example of how to format your spreadsheet:
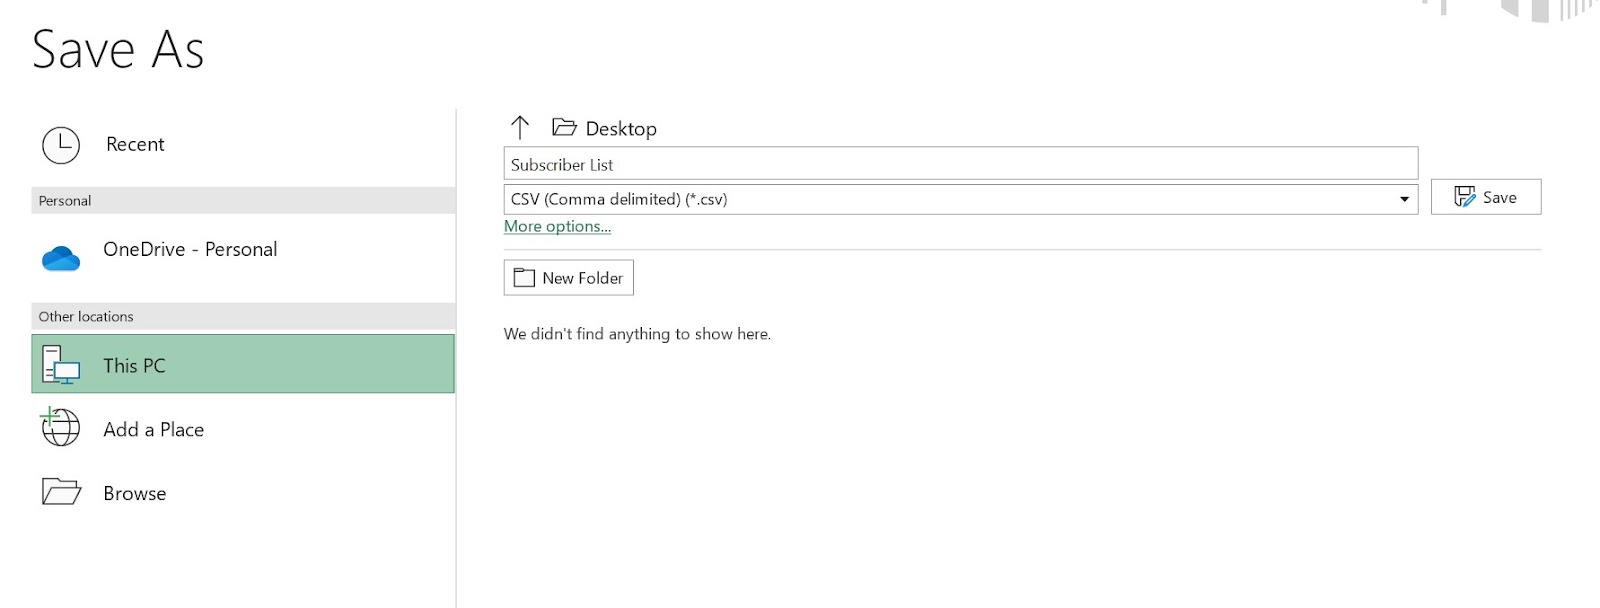
Next, save your spreadsheet as a standard CSV file. Any other format will prohibit you from uploading the spreadsheet to your database. When saving your spreadsheet, simply choose CSV from the dropdown menu.
After this, choose the keyword you’d like to attribute to this list from the “Choose Keyword” dropdown menu.

Step 4: Draft and Send a Message
Finally, it’s time to draft your first message! First, go back to the lefthand navigation menu and select “Messages.” Next, click on the blue button labeled “New Message,” and you will be directed to a screen where you can write your message.
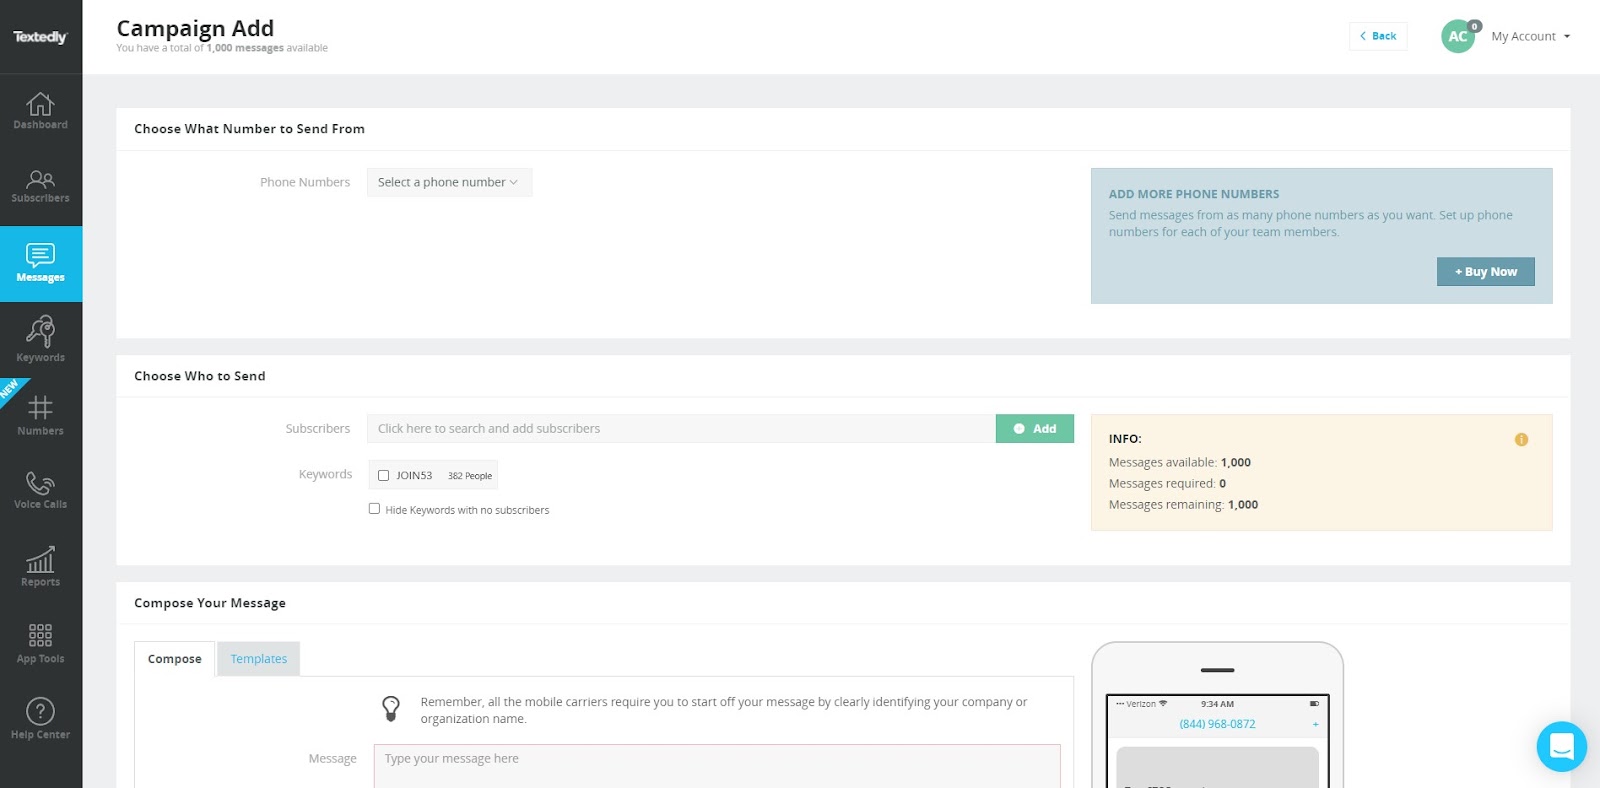
Select the phone number from which you will be sending your message. This could be a shortcode like 25667 or a full-length 10-digit long code like (818) 123-3345. This is the number your contacts will begin to associate with your business.
Next, choose whom to send your message to. Select your subscriber list and the keyword associated with that list.
Now, draft your message. You can write something from scratch or pull one of your existing templates. You can still adjust templates once they populate in the message field, but many businesses find them helpful as a starting point.
Here are some sample SMS templates to get your thoughts flowing.
Once you’re happy with your message, you can schedule it for a specific day and time or you can push it out immediately.
Step 5: Monitor Your Campaigns
In the “Reports” section of the lefthand menu, you’ll access daily and monthly report views for all of your campaigns.
- The Activity Report shows you how many messages you sent compared to how many were delivered.
- The Numeric Reports section gives you a birds-eye view of your activities overall. You’ll be able to compare how many campaigns you’ve created with the number of messages you’ve sent, how many subscribers you have and more.
- The Keyword Report chart allows you to see how many subscribers you earn for each keyword weekly or monthly.
Check Your Inbox
If you allow replies to your text messages, you should periodically check your inbox. To see who has responded to a text, click on “My Account” in the top right corner from any Textedly platform screen. One of the dropdown items is “Inbox.” Simply click here to view all of your received messages.
Choose Textedly To Connect With Your Customers
Textedly is a user-friendly bulk SMS platform that is intuitive and easy to understand. If you still have questions like “how does Textedly work” or “how do I start a campaign,” feel free to reach out to one of our experts. We’re happy to help!
Start connecting with your contact base today, and (if you haven’t already), sign up for a free trial to test it out for yourself!


.png)